The best concealer for your under-eye area: how to pick them and apply them
Written By Jenny Wu on
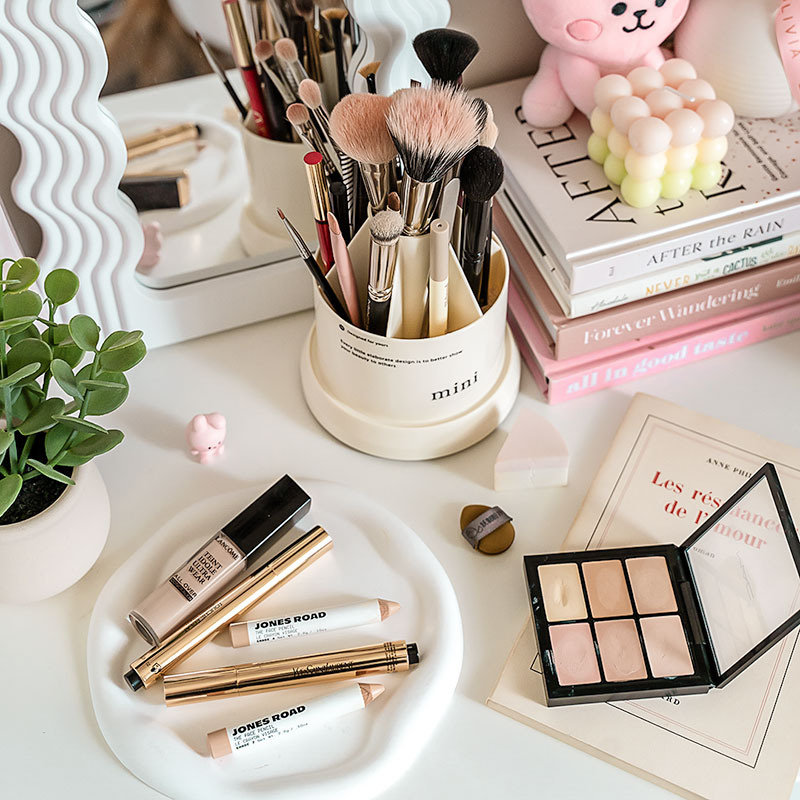
It’s true that your eyes are the first to show signs of aging, and not just with fine lines and wrinkles. For me it was the tear troughs, and of course the perpetual dark circles I’ve had since my college days.
While topical skincare like eye creams are important, nothing erases years instantly like the right under-eye concealer for your skin type and tone, tactfully applied in the right place. So let’s get into the details!
Step 1: Prep the surface of your skin
If you’re reading this, chances are dark circles are only one of many of your under eye problems. Dry skin, fine lines, who else is with me? 🙋🏻♀️ Which means this first step is key to making sure everything else looks good, but it may actually be part of your routine already.
It’s using an eye cream. Really, that’s it.
Well ok, it’s a bit more than that.
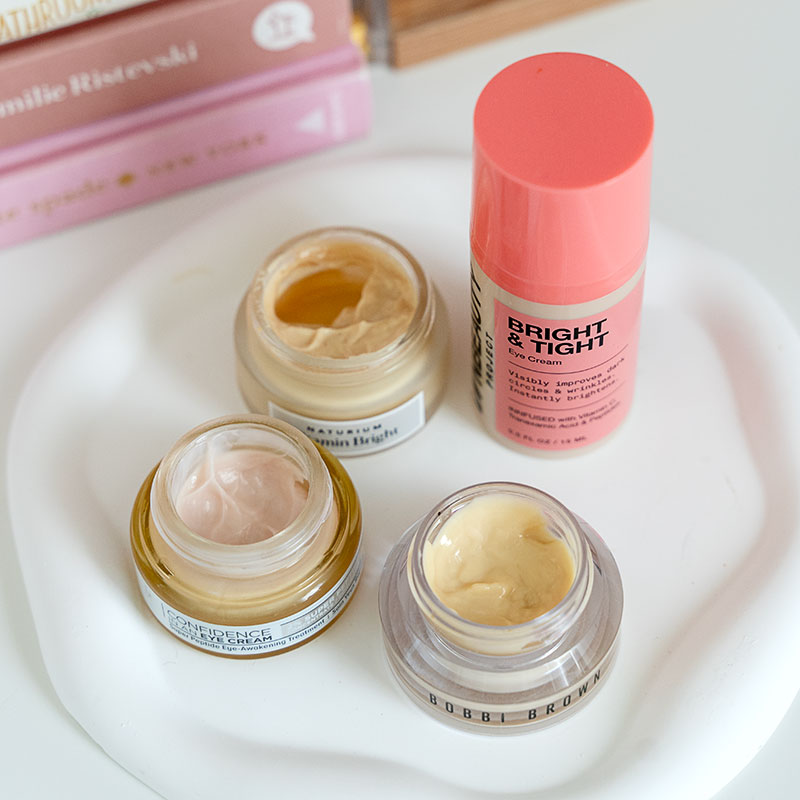
If you’re applying makeup, you’ll want to find an eye cream that’s moisturizing without being too oily, and save those rich and slippery formulas for the evening. A water gel texture works well under makeup, or find one with a velvet finish. Some even include brightening or color correcting particles to give you a head start on concealing! Here are some options I’ve tried and enjoyed:
Step 2: Find the right formula
This is heavily dependent on your skin type and condition. Here are the different types of concealer, their advantages, and who they’re best suited for:
| Stick Concealers | Cream Concealers | Liquid Concealers |
|---|---|---|
| ✅ Easy to apply ✅ Easy to control the amount | ✅ Easy to control the amount ✅ Provides the best coverage ✅ Less drying than stick | ✅ Most options available ✅ Great mix of coverage and shade range ✅ Typically has a more hydrating formula |
| ❌ Can be drying ❌ May be hard to apply precisely | ❌ Still not as moisturizing as liquid ❌ Palettes can feel overwhelming ❌ Can crease or settle into fine lines | ❌ Can easily apply too much product |
| If you have oily skin and not many fine lines or wrinkles, stick concealers could work well for you. | I consider this the happy medium between stick and liquid, and my go to when I want the best results. Can work for all skin types but not necessarily the best fit for any specific one. | Some of my favorite crease-proof formulas are liquid, and with so many options available, it’s easier to find one that fits your skin type and needs. |
My recommendations for each type of concealer
We’re talking specifically great for the eye area, not overall. There are definitely concealers I love for overall coverage but they just don’t work as well to address eye issues. The good news is that these not only work wonderfully on dark circles, but they are great for the rest of your face too!
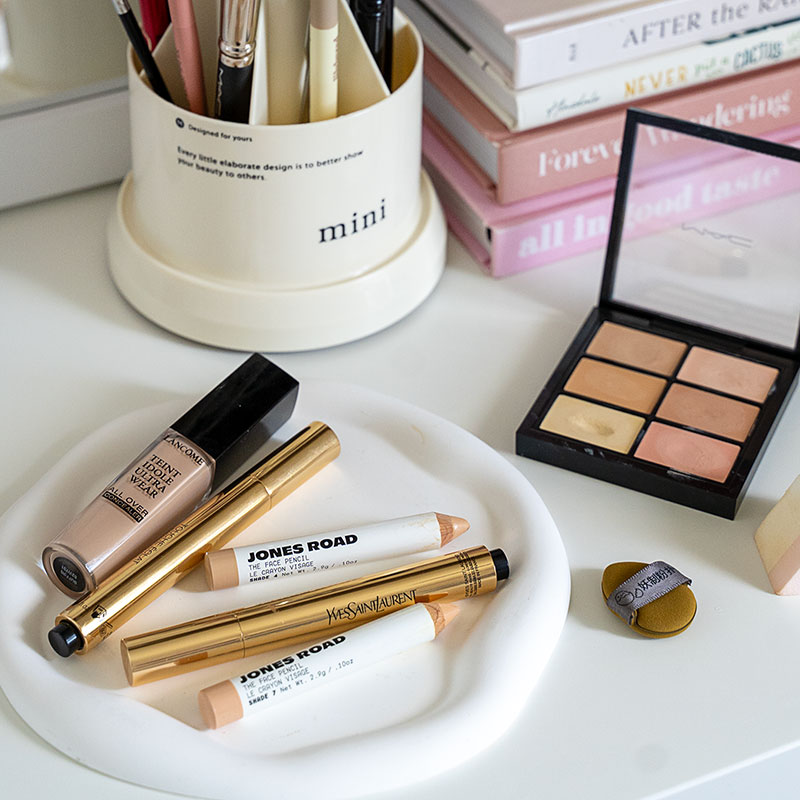
- For stick I really like Jones Road The Face Pencil*, it glides smoothly across the skin and is surprisingly creamy while delivering medium coverage that is buildable.
- For cream I can’t recommend the MAC Studio Fix Conceal and Correct Palette enough. The 6 included shades will not only address all your under eye problems but any skin imperfection you may have, while providing natural finish.
- For liquid I’ve gotten the best results with the YSL Touché Éclat All-Over Brightening Concealer Pen*. The creamy texture is perfect for dry skin and the natural-looking coverage makes it appear as if you’re not wearing any concealer at all! An affordable dupe I also love is the Maybelline Instant Age Rewind Eraser Dark Circle Treatment Concealer. Both are great because they can easily be thrown into your makeup bag and applied in a pinch (vs concealer palettes).
Step 3: Find the right concealer shade
❌ The wrong way: picking a concealer that’s an exact match your skin tone. This could work for dark spots or blemishes, but your dark under-eye circles will still be saying hi 👋🏻
So this is a trick question. You actually need two different shades to best hide the appearance of dark circles: a color correcting shade and a brightening shade. The good news is that unlike foundation, you don’t need to find the perfect match, as long as it’s the right tone and brightness it’ll work!
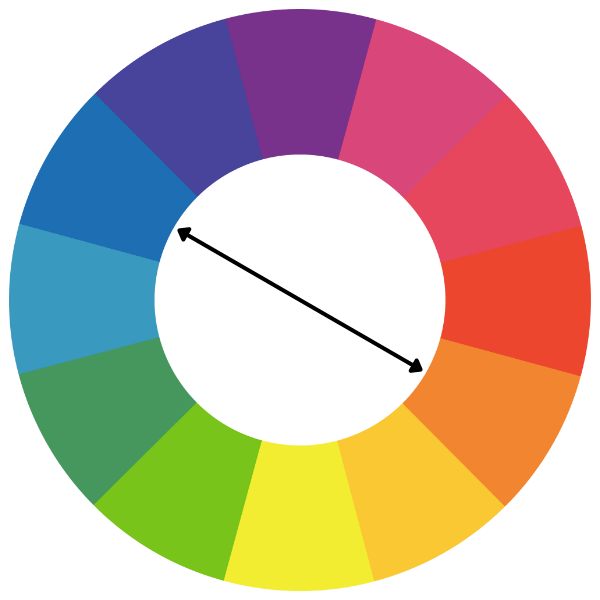
Most color-correcting concealers will have an orange undertone and a peachy or a salmon shade. These colors work very well to correct dark circles with brown or blue undertones (which most people have) since orange and blue are opposing colors on the color wheel:
Don’t worry if the color corrector shade seems darker than your regular skin tone, because we’ll address this in our next step using our lighter shade concealer!
For your lighter shade, you want to go 1, at most 2, shades lighter than your usual foundation shade. Then you need to reference your dark circle undertones again because this will make a difference:
- Use a yellow tone concealer for brownish dark circles.
- Stick to your usual undertones for bluish purple dark circles.
If you can’t tell what colors your dark circles are (“they’re just…dark!“), go by your skin’s undertone. More yellow for warm and neutral undertones and more pink for cool undertones. You can also go to Sephora and try out different colors to find the correct shade!
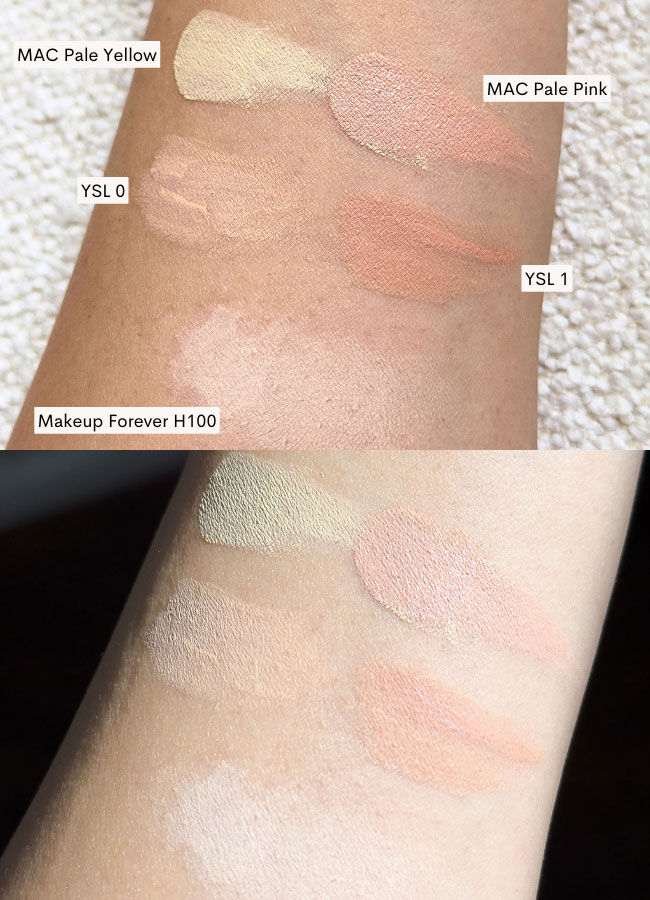
For example, I have warm undertones with brownish dark circles, and my foundation shade is usually in the light range. So for my lighter concealer, I like to use a fair yellow shade, though a regular light shade works well too.
Concealer color notes
- You need a color correcting shade and a brightening shade for your under-eye area.
- Go with a peachy/salmon shade to correct, unless you have super dark circles.
- Go with a 1-2 shade lighter concealer to brighten. Find one in a yellow shade if your dark circles are more brown than blue in color.
Step 4: Use the right tools
If dabbing a glob of concealer under your eyes and blending it out with a makeup sponge works for you, please skip this step.
But if you’re like me and find the above method only results in cakiness and poor coverage, I can’t stress this step enough. I’ve experimented with sponges, puffs, all kinds of brushes, and here’s what works:
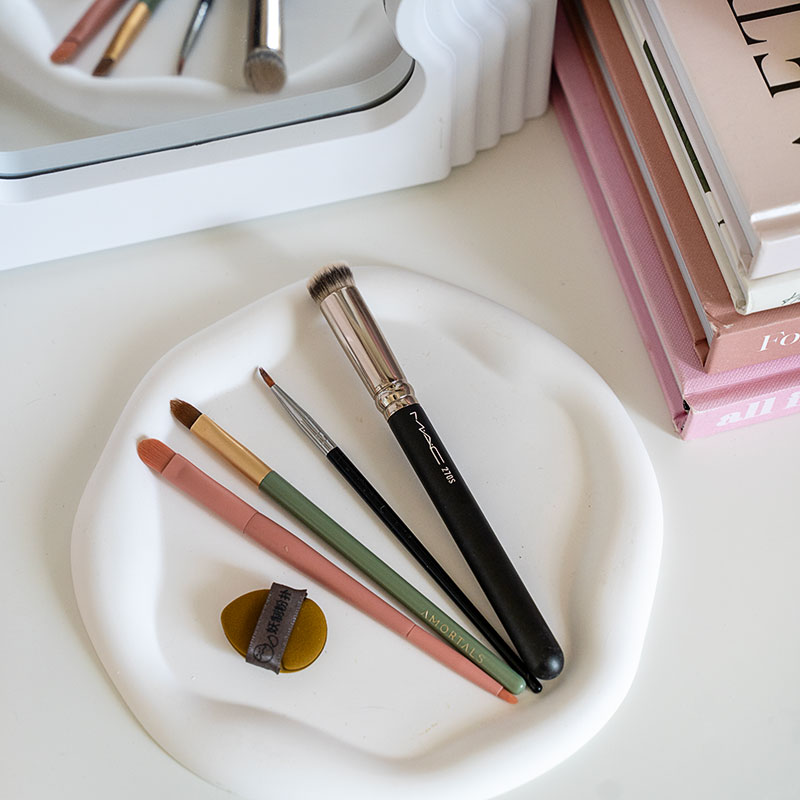
- A small flat concealer brush. I don’t know why so many concealer brushes are HUGE, but you’ll have much better luck using a smaller sized brush. I’m talking about pinky nail sized small. Real Technique has one that also comes with these great sponges for foundation, or try this Fillimilli Dual Concealer Brush which also contains a fine tipped end!
- A flat/angled dome shaped brush. This is for buffing out the color corrector. You’ll want to look for a brush with a dense, flat surface that’s not too big. My go to is the MAC 270, but a regular concealer brush can also work.
- Finger Puff. Basically a super mini cushion puff that fits on your finger. If you prefer to apply your color correct with your fingers (totally ok, just use your ring finger), you can use this mini puff to buff it out. Real Technique has a set of 3, but I actually use a random brand from Temu and it works great!
- Fine tipped brush. This is for concealing and brightening tear troughs. You can use either a lip liner or eyeliner brush, but you want the smallest tip possible to allow for precise application of cream/liquid products. Regular concealer brushes won’t work as they’re simply too big for the area we’re targeting. Once again I’m using a no-name brush from Temu!
Have you noticed a trend? Small is key! This allows us to work on just the eye area and precisely apply and blend out without touching the rest of our makeup.
Step 5: The right application method
Perhaps the single most important step, because even a great concealer and great tools can’t save you if you’re applying them wrong. Which means:
- Do not take the concealer and apply it directly on your skin! I don’t care how fancy the built in applicator is, chances are you’ll apply too much. The best way is to first wipe the excess product off on the back of your hand and until you’re left with about 50%, then apply to your face.
- Even better, apply the product to the back of your hand, then use your above tool of choice to apply it to your skin. Make sure you wipe off the extra product first so you’re left with about 50% product
- Work in light layers. Don’t try to get full coverage in one go, because I guarantee that’ll look thick and cakey. Instead, apply a small amount at a time until you have just enough to cover everything. Each layer you apply should be sheer enough that some of your skin still show through the concealer.
- Apply first to the center of your dark circles, then blend out. Start where you need the most coverage, and make sure you don’t get too close to your lower lash time. Personally I avoid concealer where my aegyo-sal (the puffy bit of skin under your eyes, NOT your eye bag) is, otherwise it ends up flattening my features.
- Pat, do not drag. No matter which tool you use, you want to pat the product on using a bouncing motion, similar to how you’d apply cushion foundation. Do not swipe and drag the brush across your skin. Even when blending you should use the same patting motion and not buff in circles, because you’re going to buff all your coverage away.
- Correct then conceal. Always start with your color correcting shade, and I would advise doing this even before foundation. Once that’s done, I typically skip foundation around my eye area and use my dedicated concealer instead.
For the more visual folks, I’ve filmed a demo of me using the YSL Touche Eclat pens, but the steps are the same for any product. I don’t usually film talking videos so please go easy on me :)
Step 6: Set with powder
Ok this might sound obvious, but I used to avoid powdering like the plague thinking it’d make my dry eye area look super cakey. Then I’d wonder why my dark circles were peaking out again after an hour. Duh.
But in addition to increasing your hours of wear, a good powder can help further brighten your eye area and giving the illusion of a youthful plumpness. Here are my picks:
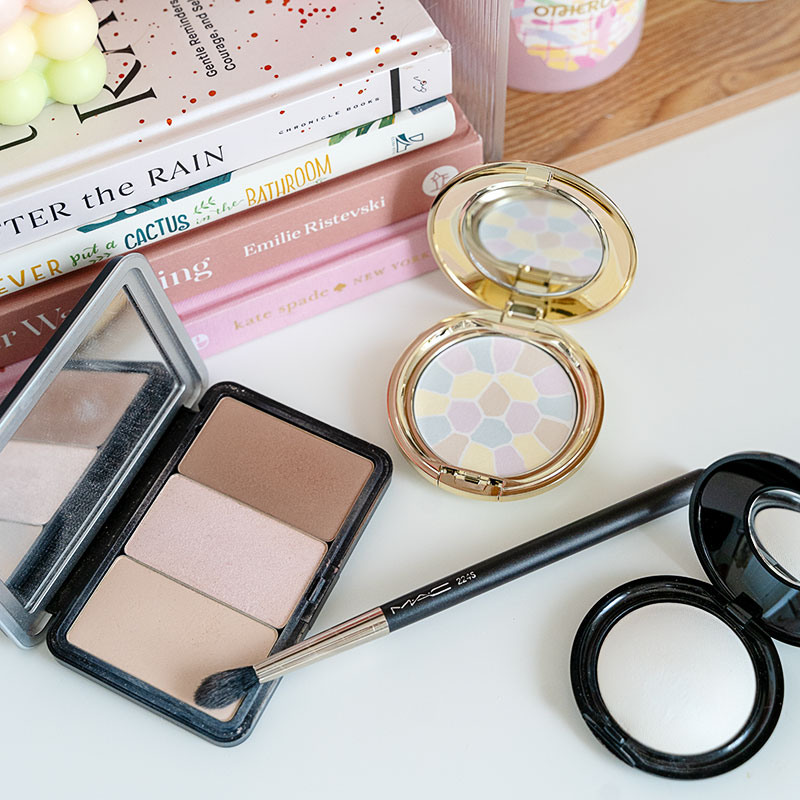
- Pat Macgrath Skin Fetish: Sublime Perfection Blurring Under Eye Powder truly blurs any imperfections while giving the eye area a soft radiant finish. The best part is it works wonderfully to set everything without any creasing!
- Makeup Forever Artist Highlighter in H100 is a matte finish powder that will work wonderfully to make any sunken areas of your skin pop, so much so that it’s known as a tear trough miracle among Chinese beauty influencers. You can use this not only on your tear troughs but nasolabial folds and other high points of your face, and it’s honestly so good you could use it on its own sans concealer. Love that it provides extra coverage and helps set concealer too.
- Albion Elegance La Poudre Haute Nuance Powder is expensive and hard to find outside of Asia, but it is truly the most beautiful and lightweight finishing powder I’ve ever tried, and worth every pretty penny. I use shade VI which imparts a soft, almost ethereal, glow to the skin while making sure your eye makeup lasts all day. It’s also super fine and won’t setting into any fine lines, making it ideal for your undereye area.
- Laura Mercier Secret Brightening Loose Powder for Under Eyes is a classic and I love that it’s formulated exactly for our purpose here. The only thing I don’t love is that it’s a loose powder, making it a bit messier compared to the other options. It gives excellent wear time though!
- Charlotte Tilbury Airbrush Flawless Finish Setting Powder is another good one to use under the eye area. It’s not drying at all, so you don’t have to worry about it accentuating any fine lines. The finish is very natural, and while the powder does have some color, it won’t really add any coverage.
Before & After
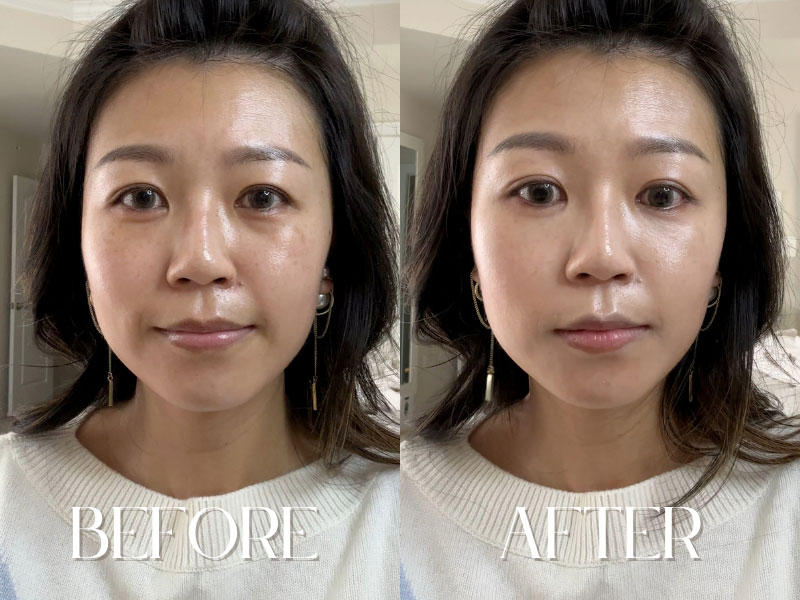

So there you have it – the ins and outs of concealing those pesky dark circles and more. Finding the right shade of concealer can seem overwhelming at first, but with practice, a little patience, and these tips, you’ll be well on your way to brighter, more awake-looking eyes. Remember, the key to a good eye makeup routine is to prep, correct, apply with precision, and set with care. Now go forth and conquer those shadows!

Passionate about science-based skincare. Tested hundreds if not thousands of products since my 20's. Working regularly with brands like iHerb, Ulta, CurrentBody, and MedStar Health to share my knowledge and experience in all things beauty. Learn more.
Skin profile: 35+, dry/combination, focused on well-aging, hydration, and a healthy glow ✨

Comments & Questions
Anne
I really mastered the art of under eye concealer once my daughter was born. I use a buffing brush to distribute the concealer after applying, it gives the best finish for me.
Ellie T.
Anyone got tips for making concealer last on oily skin?
Jenny Wu
Powder is your best friend
Max
TBH, I feel like no matter what brand I try, my eye circles show through by lunch. Is it just me or do others have this issue too?
Sarah
So grateful for this guide! I always pick the wrong shade cause I thought matching my skin tone was the way to go. Gonna try going a shade lighter this time. Wish me luck!
Chris
I'm not convinced that setting powder is the best for everyone, especially if you have dry skin around your eyes. Won't it accentuate the fine lines even more?
Amy
Actually, if you use a hydrating concealer and a light touch of setting powder, it can prevent creasing without drying out.
Jenny Wu
That's why finding a powder that won't settle into your lines is key. I have dry skin as well and none of the powders I recommended accentuates my fine lines.
Jenna
Loved how detailed this article is! Finding the right concealer has always been a struggle for me until I understood the importance of prepping the skin. It really makes a difference!
Tasha
Do you have any budget-friendly skin prep recommendations?
Danny
After reading this, I might actually start using concealer. Bye-bye raccoon eyes, hello handsome! 😆
Liz P.
Always on the go and I've found using the right tools makes a huge difference. A good blending sponge is a game changer.
Ron
You mentioned the importance of skin prep, but didn't go into specifics. Are there particular ingredients or products that work best for under-eye prep?
Jenny Wu
A hydrating eye cream helps me immensely. If you already have one you're using, just stick to that.
Tori V.
Interesting article. I'll try some of these tips next time I'm trying to hide my lack of sleep.